I'm featuring Phyllis & Finn the Fish...the stamp set I illustrated last month. I did get to play around with watercolor background ideas after all!! See the Animal House animals if you like my illustrations.
Showing posts with label Craft Idea. Show all posts
Showing posts with label Craft Idea. Show all posts
Thursday, July 27, 2017
Watercolor Background Tutorial Video
I made this quick tutorial video showing how to make quick watercolor backgrounds for handmade cards or projects. Bev, my boss, narrated the video. She has a great "radio" voice. I love her narrations.
I'm featuring Phyllis & Finn the Fish...the stamp set I illustrated last month. I did get to play around with watercolor background ideas after all!! See the Animal House animals if you like my illustrations.
I'm featuring Phyllis & Finn the Fish...the stamp set I illustrated last month. I did get to play around with watercolor background ideas after all!! See the Animal House animals if you like my illustrations.

Tuesday, September 06, 2016
Easy Water Coloring Tutorial
Beautiful bluebell water colored card created by Birgit Edblom. This handmade card is one of many in the Technique Tuesday idea gallery. Birgit has added tons of gorgeous works of art to the gallery.
 I'm excited to share a link to my bluebell watercolor video. I've been creating some tutorial videos for Technique Tuesday. This video is probably the easiest of the the three. I use watercolor crayons to add some color to the little bluebell stamp set. My Momma loves blue bells and she flipped when I gave her the finished card. Yay!
Check out the video here: http://www.techniquetuesday.com/Videos-Gallery/ZZ-Video-Bluebells-Watercolor.html

Check out the video here: http://www.techniquetuesday.com/Videos-Gallery/ZZ-Video-Bluebells-Watercolor.html
Saturday, September 06, 2014
Watercolor On Digital Stamps

Sunday, June 09, 2013
DECORATED ENVELOPES
 |
| "Decorated Envelopes" (Sharpie) artinflight.blogspot.com |
 |
| "Decorated Envelopes" (Sharpie) artinflight.blogspot.com |
 |
| "Decorated Envelopes" (Sharpie) artinflight.blogspot.com |
 |
| "Decorated Envelopes" (Sharpie) artinflight.blogspot.com |
Also linking with Diane Evans 10min. Warm Ups!
Thursday, May 09, 2013
NAIL POLISH ART
 |
| Nail polish |
 |
| Nail polish ready to do something.... |
 |
| Dark nail polish colors. |
 |
| Light nail polish colors. |
 |
| Glitter nail polish. |
 |
| More glitter nail polish and nail polish layered. |
 |
| Nail polish art. |
 |
| Nail polish art close up. |
 |
| Nail polish fashion sketches. |
 |
| Fashion nail polish sketch. |
Linking with Paint Party Friday and Sunday Sketches!
Tuesday, April 30, 2013
ARTIST TRADING CARDS STEP BY STEP
 |
| This is my water color technique! |
 |
| I have a pre-cut ATC on hand to make sure I have everything centered and the right size (2.5 x 3.5 inch) for ATC's. |


 |
| Just can't say "tree balls", sounds funny! |


Three finished ATC's!
These are my two favorite Artist Trading Card swap sites.
For more information about an Artist Trading Cards click here: ARTIST TRADING CARDS
Tuesday, March 19, 2013

Thursday, January 10, 2013
HANDMADE ENVELOPES
 |
| Diagram of envelope making supplies. |
 |
| I made a bunch of handmade envelopes for my Mom's and Sista's for Christmas! |
 |
| Old calendars are awesome because they usually have great photos or art work with perfect composition. They are thick and sturdy. I use the clear template, which is amazing, to see how the image will look on the folded envelope. Using the silver sharpie gives the edges a pretty silver look. I don't have to be as careful to cut off all the tracing lines unlike using a harsh black sharpie. |
 |
| They even have special glue so you can add stuff for licking later to sealing the envelopes. |
 |
| In other news, I took a picture of the germs (last post) made into magnets but guess what? This is what was on the camera. In my mind, germs bugs, same thing! HA! |
 |
| My Dad and I Christmas Eve, he especially loved the airplane envelopes I made. Who knew.... |
Friday, October 19, 2012
BLEACH PEN ART
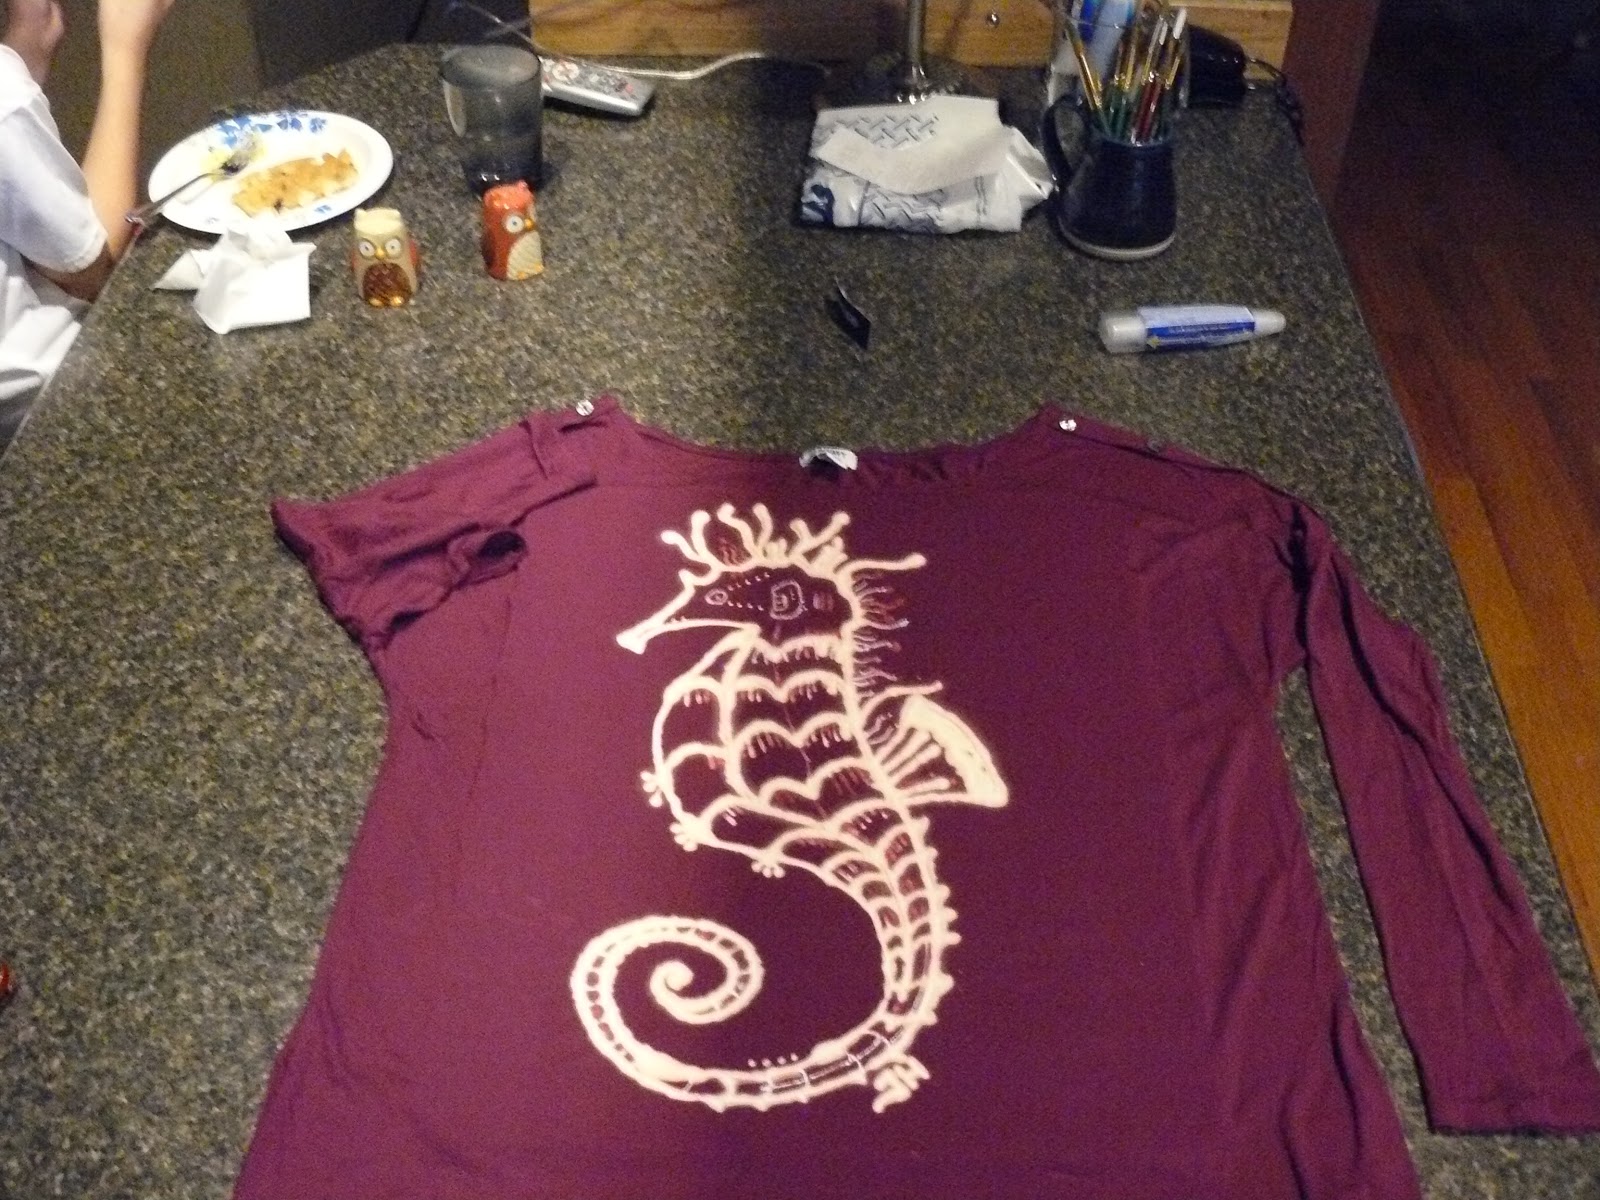 |
| Bleach pen seahorse project! I made this seahorse for my sis-in-law's Mom. Hope she liked it! I'm noticing Tommy is eating some eggs in the back ground. Funny! We are always sharing space in our tiny I mean, cozy house :) |
 |
| Bleach pen is NOT easy to work with. It likes to glob out of the tube and there are tons of air bubbles in the bottle. Another one of those project where I start the drawing and the rest of the time I just fix and fix and fix. It's a big mistake made to look like it was on purpose. Ever feel like you're working like that? |
 |
| AND different brands of bleach pen work differently. The bleach pen made for whites was intense and really bleached the color out. The regular bleach pen it much lighter giving a batik look. It was fun. A challenge and I like a challenge! |
 |
| Andy's first dance last Friday night. So cute! |
Tuesday, November 30, 2010
TAGTASTIC


Thursday, November 25, 2010
WARM SNOWFLAKES


I was able to get the boys to sit down and make exactly two paper snowflakes with me.
That's it! Just two. But I'll take it :)
~Happy Thanksgiving~
Monday, November 02, 2009
PATCHES FOR PURSES
 These goofy little characters are for the purses I'm trying to make. Well, I don't really make the purses, Minh does but I embellish some of them. I use fabric paint and permanent markers. I'm super impressed. It all actually works better than I thought it would. The colors are fabulous and blend well.
Sunday, February 15, 2009
OWL BOOKMARKS

These little things are my bookmark submissions for the Owl Bookmark Swap on Swap Bot. I've been having fun with that site! I also discovered Atcs For All, another site I didn't know existed until the other day! So much fun!
Monday, February 02, 2009
DECORATED ENVELOPE SWAP


Here is a postcard and an envelope, front and back, in the theme of winter for the Decorated Envelope Swap over on swap-bot. I made a boo boo and sent the darn thing without checking the address. It needs to be sent to Canada, and I forgot to put the appropriate postage. Darn it! I'll need to come up with another little sumthin sumthin for my partner in the mean time.
Tuesday, February 12, 2008
COOPER MOUNTAIN SCHOOL PROJECTS
First project, an artist came to make the beautiful new stained glass windows for our Cooper Mountain School. The Art Lit people at school helped the different classes break glass for the windows.
Next we got the Cooper Mt. Art Fair done! There were six local artists (I got to be a local artist!) music performances (Andy got to play the guitar!) and beautiful art work done by the Cooper Mt. Children. It went well except for the 20 ounces of coffee I spilled on the supplies right before the fair started.
Then it was time to work on the Art Auction.
Finally, that's done too. It's a good thing I like painting, the auction projects took a long time. The first and fifth graders did such a good job painting the turkeys, pumpkins, ladybugs, bees, frogs, ducks and snowmen. below are the cookie jar and plate we worked on. I was really impressed with all the drawing and painting the kids did.


 |
Subscribe to:
Posts (Atom)